
VI. Finishing
This is a great technique to know for magazine and page layout.
Overview
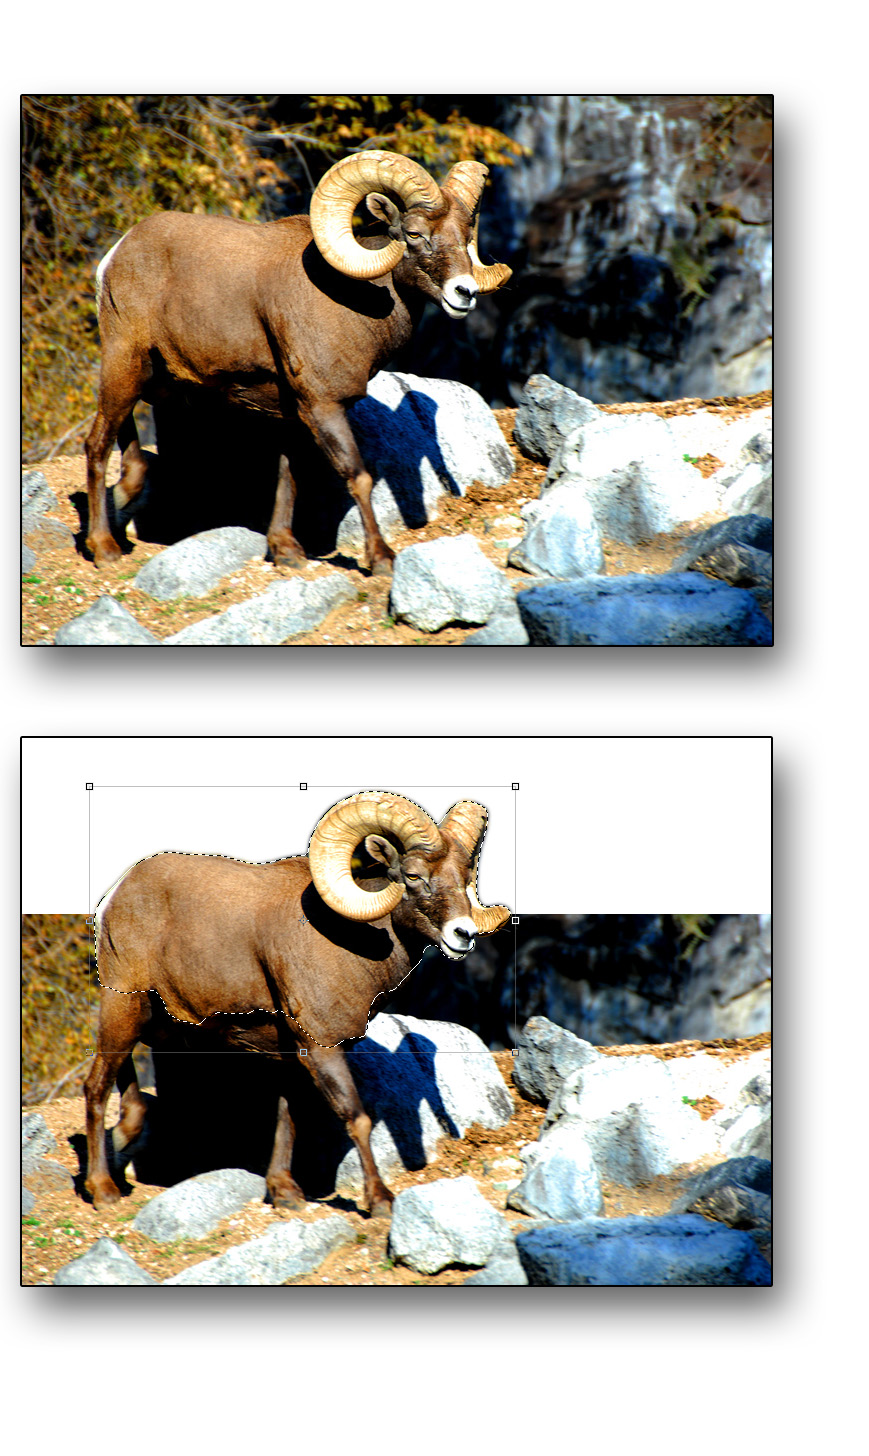
This partial cutout technique teaches you about how Photoshop layers work and provides a nice alternative to the full cutout.
Steps:
- Use the rectangular marquee to select the part of the image you want to remove.
- Create a new layer (Shift Apple N) and fill it with white (Option Delete)
- Deselect (Apple D) the marquee and hide the layer (eye icon to the left of layer)
- Switch to the image layer, and use the Quick Selection Tool to select the entire object you want to “cut out.” See VI.8. Cutouts for more details for clean cutouts.
- Choose Select – Refine Edge to add a slight feather and contrast shadow. (This mode will also allow you see any stray pixels that need to be cleaned up in the selection.)
- Once refined, copy this selection to a new layer (Apple J) then drag this layer to 7. Reveal the white filled layer (eye icon to the left of layer).
